 Skip to content
The world of gadgets is changing fast today. Everyone wants to build smart things that talk to each other. This is where the antennino comes into the picture for makers. It is a special wireless board made for cool DIY projects. You can use it to build your own smart home. It makes the Internet of Things very easy to understand.
Introduction to Antennino
The antennino is more than just a simple circuit board. It is an Arduino-like circuit that loves to save power. The name comes from mixing the words antenna and Arduino. This name tells you exactly what it does best. It connects your ideas to the digital world wirelessly.
Definition and Origin
- A hybrid name: The name combines antenna and Arduino to show its focus.
- Project goals: It aims to provide a low-cost and low-power solution for creators.
- Open source roots: The board follows the open-source spirit for easy sharing.
The IoT Challenge
Modern IoT projects face two big problems today. Most devices use too much battery power quickly. They also struggle to stay connected over long distances. The antennino solves these issues with its smart design. It stays connected without killing your batteries fast.
Core Philosophy
This board is designed to be a multirole tool. It can act as a simple sensor node. It can also work as a main data collector. The design is efficient and very easy to use. Every part is chosen to save energy and space.
Compatibility
You do not need to learn new software for this. It works perfectly with the famous Arduino IDE. It also supports PlatformIO for more advanced developers. You can use all your favorite Arduino libraries here. This makes moving from an old board very simple.
Hardware Architecture and Core Specifications
The build quality of this board is top-notch. It uses parts that are famous for being reliable. The layout is clean and ready for your wires. It fits a lot of power into a small footprint. This makes it great for tiny enclosures or cases.
The Heart of the Board
- ATmega328P chip: This is the brain of the board.
- PicoPower technology: This technology helps the chip use almost zero energy.
- Proven reliability: This chip is used in millions of devices worldwide.
Frequency and Timing
The board uses a 16 MHz resonator for timing. This keeps all your code running at the right speed. It ensures that wireless data travels without errors. Stability is key for long-term remote monitoring tasks. You can trust it to stay in sync.
Onboard Components
- Temperature sensor: It has a built-in DS18B20 for heat checks.
- Photoresistor: A light sensor is ready for your brightness projects.
- User interface: It includes a reset button and a bright notification LED.
Memory Management
It has a special Flash memory chip on board. This memory is perfect for storing sensor data logs. It also enables wireless programming known as OTA. You do not have to plug it in to update. This is a huge win for remote sensors.
Wireless Communication Capabilities
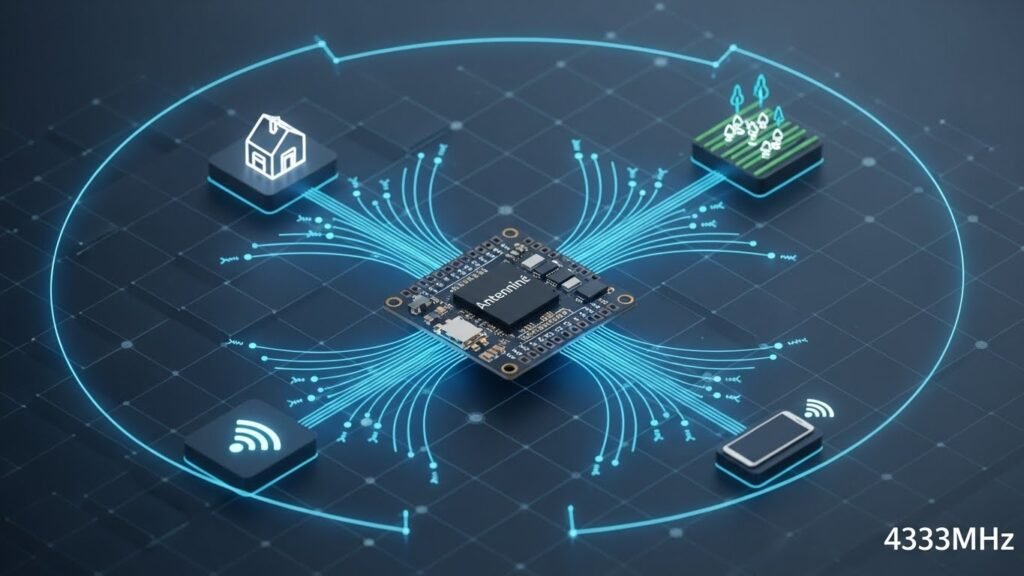
Connecting things without wires is the main goal here. The antennino has a very strong wireless heart. It can talk across your house or your farm. This flexibility opens up many new project ideas. It is like giving your project its own phone.
The RFM69 Transceiver
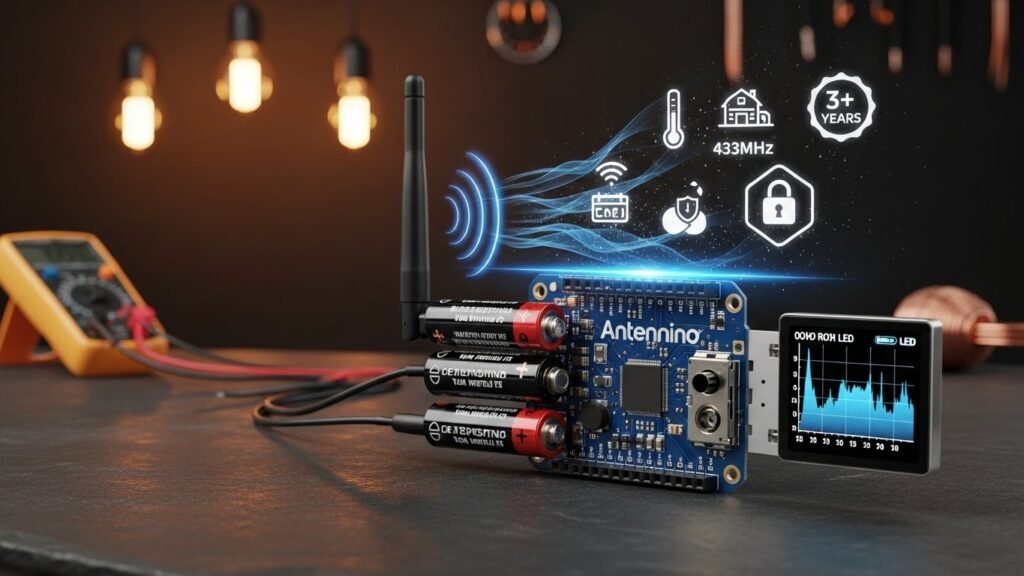
- 433MHz frequency: This band is great for passing through walls.
- License free: You can use this frequency without special permits.
- Compact module: The transceiver is small but very powerful.
Security First
You want your data to stay private and safe. This board supports AES cryptography at the hardware level. It scrambles your messages so others cannot read them. Your smart home stays secure from hackers. Security is built right into the wireless chip.
Protocol Support
- LoRaWAN: This is perfect for very long-range outdoor projects.
- Wi-Fi: Use this for fast connections to your home router.
- Bluetooth: Great for talking to your smartphone or tablet.
Automatic Transmission Control (ATC)
The board is smart enough to save its own breath. It uses ATC to check how much power it needs. If the gateway is close, it uses less energy. This automatic power tuning helps batteries last much longer. It only yells when it really has to.
The Importance of the Antenna
A good antenna is vital for any wireless device. The antennino uses a monopole antenna for clear signals. It often features a U.FL micro connector for easy swaps. Never run the module without an antenna attached. Doing so could cause permanent damage to the chip.
Revolutionary Low-Power Management
Saving energy is the coolest feature of the antennino. It is built from the ground up to be efficient. Most boards waste power when they are not busy. This board sleeps deeply to save every drop of juice. It is a game changer for battery projects.
The PicoPower Advantage
The ATmega328P chip has a special low-power mode. In deep sleep, it uses almost no current at all. It waits silently until it is time to work. This allows projects to run for years on batteries. It is much better than standard Arduino boards.
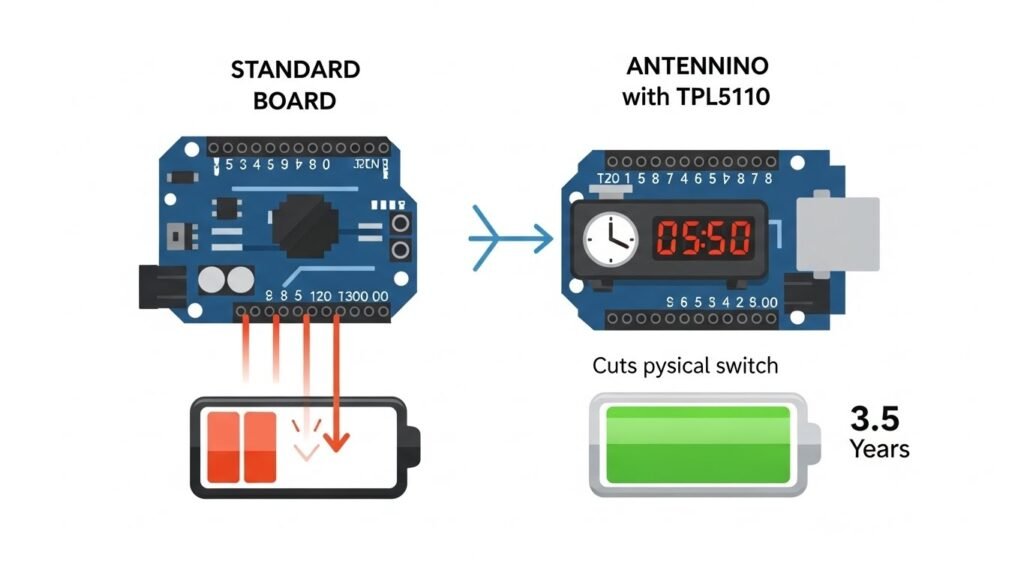
External Timer Strategy (TPL5110)
- Extreme efficiency: This timer uses only 35 nano-amperes when waiting.
- Full isolation: It can cut off power to the whole board.
- Smart intervals: You can set it to wake up whenever you want.
WDT vs. External Interrupts
Standard boards use a Watch Dog Timer to wake up. This still uses a little bit of battery power. Antennino can use a hard-wired external interrupt instead. This is even more efficient than the standard way. It keeps the power consumption at the absolute minimum.
The “DONE” Signal
When the board finishes its job, it says so. It sends a signal to the TPL5110 timer. The timer then cuts the power off immediately. No energy is wasted on an idle board. This feedback loop makes the system incredibly smart.
Energy-Saving Circuitry
The board can also turn off its own sensors. It uses a P-MOS transistor to cut their power. The temperature and light sensors only get power when needed. This stops sensors from draining the battery for nothing. Every part of the circuit helps save energy.
Power Source Versatility and Battery Life
You can power this board in many different ways. This makes it fit into any project you have. Whether you are indoors or out, it works. You do not need to worry about power cords. It gives you total freedom to build anywhere.
Multiple Powering Modes
- AA Batteries: You can use two standard 1.5V alkaline batteries.
- External Voltage: It accepts 3.6V to 12V through a connector.
- Direct 3.3V: You can bypass the regulators for maximum efficiency.
The MAX856 Switching Regulator
This chip is a high-performance power tool. It can start working with just 0.8V of power. This means it can squeeze every bit from batteries. It provides a steady 3.3V for the entire board. It is a very efficient way to manage power.
Battery Monitoring
The board checks its own battery health constantly. It uses a voltage divider on the A0 pin. You can write code to send low-battery alerts. This helps you know when to swap batteries. You will never be surprised by a dead sensor.
Estimated Autonomy
With the right settings, battery life is amazing. It can run for over three years on AAs. This assumes it sleeps most of the time. Short bursts of data keep the consumption low. This long life makes it perfect for remote sites.
Versatility: Gateway and Node Roles
The antennino can wear many different hats at once. You do not need different boards for different jobs. It is easy to change how it works. This versatility saves you a lot of money. One board design covers your whole project network.
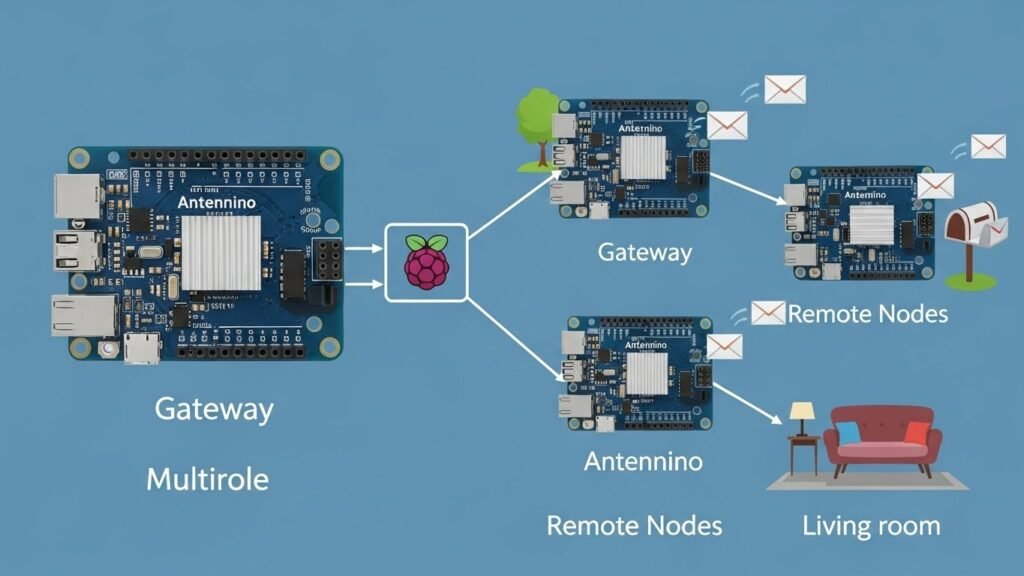
Operating as a Node
In this role, it stays out in the field. It reads sensors like temperature or soil moisture. Then it sends that data back wirelessly. Nodes are usually powered by small battery packs. They are the hands and eyes of your system.
Operating as a Gateway
The gateway is the main hub for data. It listens to all the nodes in your house. It can send that data to the internet. Gateways are usually plugged into a wall outlet. They act as the brain for your local network.
Scalability
Starting small is very easy with this board. You can begin with just one sensor node. Later, you can add dozens of more nodes. The gateway can handle many sensors at once. Your project can grow as big as you want.
Connectivity and Expansion Options
Adding new parts to the antennino is a breeze. It has many ports for your extra gear. You do not have to be a soldering pro. It is designed to be friendly to newcomers. Expansion is a core part of its design.
Groove Connectors
- RS232: Connect to serial devices or your computer easily.
- I2C-Bus: Daisy-chain many sensors using just two wires.
- Analog Input: Perfect for reading values from analog sensors.
OLED Display Integration
You can add a tiny screen for visual data. It supports SSD1306 and SH1106 OLED display types. This is very helpful when the board is a gateway. You can see sensor readings right on the board. The U8glib library makes these screens easy to program.
Pin Configuration
The board layout matches the Arduino Uno style. This means many existing shields will work perfectly. You can reuse parts you already have at home. The standard pinout reduces confusion for all makers. It feels just like using a regular Arduino.
Practical Applications and Common Use Cases
There are so many things you can build. People all over the world use it today. It works in homes, farms, and even hospitals. The only limit is your own creative imagination. It turns your ideas into real smart gadgets.
Smart Home Automation
- Lighting control: Turn lights on or off from your phone.
- Energy management: Track how much power your appliances use.
- Security sensors: Build window and door alarms for your home.
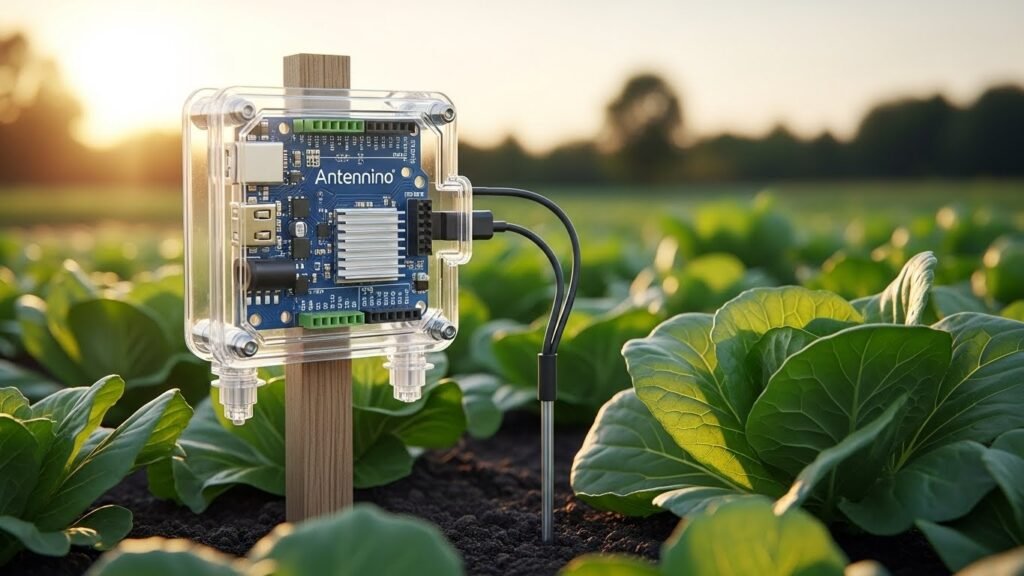
Precision Agriculture
Farmers use this to watch their crops closely. It monitors soil moisture so they water correctly. It tracks local weather conditions in the field. This helps save water and grow better food. Remote sensors are vital for modern farming success.
Healthcare Innovations
- Wearable health: Build devices that track your heart rate.
- Temperature tracking: Monitor body heat for signs of illness.
- Real-time data: Send health stats to a doctor instantly.
Environmental Monitoring
You can place these sensors in remote forests. They track air quality and detect smoke early. They can also watch water levels in rivers. Since they use batteries, they work anywhere outside. They help researchers protect our natural world daily.
Industrial and DIY Acts
Factories use vibration sensors to check big machines. If a machine shakes too much, it alerts. Makers use it for remote-controlled robots too. It is great for any task requiring remote action. Remote actuators can flip switches from far away.
Technical Setup and Getting Started
Starting your first project is a simple path. You just need a few basic things first. The community is very helpful if you get stuck. In no time, you will have things talking. It is an exciting journey into the IoT world.
Essential Components
- The Board: You need at least one antennino board.
- A Computer: Use your PC or Mac to write code.
- Sensors: Grab some extra sensors for your specific project.
Software Configuration
First, you must download the free Arduino IDE. This software lets you write your project code. You will also need to install some drivers. These help your computer talk to the board. Once set up, uploading code is very fast.
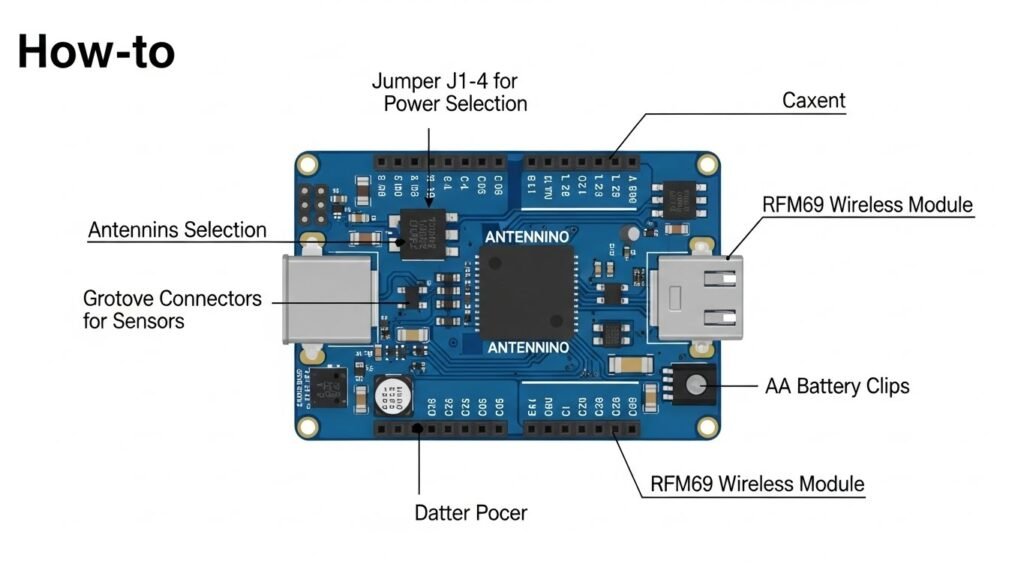
Jumper Settings
The board has several tiny jumpers for settings. These jumpers tell the board how to get power. For example, J1 helps with the wake-up timer. J2, J3, and J4 select the battery mode. Always check the manual before moving these jumpers.
Programming and OTA
- USB Upload: Use a serial converter for your first upload.
- Sketches: Use standard Arduino sketches for your project code.
- OTA Updates: Update your code wirelessly through the air.
The “Hello World” of IoT
Your first goal should be a simple message. Set up one node to send a “hello”. Set up a gateway to receive that message. When the gateway blinks, your network is working. This proves your wireless link is strong and ready.
Comparative Analysis: Antennino vs. The Competition
Choosing the right board can be a tough job. Many other boards try to do similar things. But the antennino has some very special tricks. It is built for a specific kind of work. Let us see how it stacks up here.
Antennino vs. Raspberry Pi
A Raspberry Pi is like a full computer. It is very powerful but uses huge power. Antennino is much smaller and uses tiny power. You cannot run a Pi on AAs for years. Antennino wins for simple, remote battery-powered tasks.
Antennino vs. ESP8266
The ESP8266 is famous for its Wi-Fi speed. But it often needs extra parts to save power. Antennino has low-power features built right into it. It is a more complete kit for makers. It works better for long-range, low-energy sensor networks.
Budget and Pricing
- Affordable price: It usually costs between twenty and forty dollars.
- Where to buy: Look on Amazon, eBay, or specialized tech shops.
- Great value: You get many features in one single package.
Conclusion: Why Antennino is the Future of DIY IoT
The antennino is a fantastic tool for any maker. It makes building wireless gadgets easy and fun. You do not have to worry about batteries. It brings your smart ideas to life quickly. It is the perfect heart for your next project.
Summary of Benefits
It offers a seamless move from regular Arduino boards. The power efficiency is truly top of the class. You get a robust wireless range for any site. It acts as both a gateway and node. This saves you money and reduces complex wiring.
Final Verdict
If you need a remote sensor, get this board. It is built for long-term battery-operated deployments. Hobbyists and pros will both find it useful. It is reliable, secure, and very easy to program. It is a solid choice for modern IoT.
The Path Forward
The world of smart things is only getting bigger. Using a board like this puts you ahead. Start with one simple idea and build it. Join the community and share your cool inventions. The future of IoT starts with your creativity.
FAQs
What is the maximum line of sight range for Antennino?
Using the RFM69 transceiver at 433MHz with a basic monopole antenna, you can expect a range of about 200 to 500 meters in open fields. If you use a high-gain external antenna or lower the data rate in your code, you can sometimes reach over 1 kilometer. Inside buildings, walls and furniture will reduce this distance significantly, usually down to 30 or 50 meters.
Can I use Antennino with a 5V power supply?
No, you should be very careful because the board is designed for 3.3V logic. If you plug a 5V source directly into the 3.3V pins, you will likely fry the microcontroller and the wireless module. Always use the external voltage input pin if you are using a supply higher than 3.3V, as this pin goes through a regulator that safely drops the voltage down.
Is it possible to use the board without the TPL5110 timer?
Yes, you can choose to bypass the external timer if your project does not need extreme energy savings. You can use the internal Watch Dog Timer of the ATmega328P to wake the board up. This is done by changing the jumper settings on the PCB to the internal management mode, which is still very efficient compared to a standard Arduino.
What is the purpose of the AES encryption in the RFM69?
The AES encryption scrambled your wireless data so that anyone with a similar radio cannot listen to your messages. This is important for smart home security, like when you are sending signals to unlock a door or disarm an alarm. You simply set a secret key in your code, and the hardware handles the scrambling automatically.
Can I run a web server on Antennino?
While you can connect a Wi-Fi module to the board, the ATmega328P chip has very limited memory. It is not strong enough to host a full website with images. It is much better at acting as a client that sends small bits of data to a more powerful server, like a Raspberry Pi or a cloud service.
How do I change the wake-up interval on the TPL5110?
The interval is determined by a specific resistor value connected to the timer chip. On the board, you can swap out a resistor or use a small trimmer to adjust the timing. The intervals can range from once every 100 milliseconds up to once every two hours, depending on the resistance you choose.
Does Antennino support LoRa technology?
The standard version uses the RFM69 module, which is not LoRa. However, because the board uses standard SPI pins, you can technically desolder the radio and replace it with an RFM95 LoRa module. This would allow you to use the LoRaWAN protocol for even longer ranges, though it requires more advanced coding.
Why does the board have a dedicated Flash memory chip?
Most Arduino boards lose their temporary data when the power is cut. Since Antennino is designed to turn its own power off to save energy, it needs a place to store data permanently. The Flash chip acts like a tiny hard drive where you can save sensor logs or the new firmware during an OTA update.
Can I use 1.2V NiMH rechargeable batteries?
Yes, the board is specifically designed to work with two AA batteries, including rechargeables. The MAX856 regulator is very efficient at stepping up the low voltage of NiMH cells to the 3.3V needed by the system. It can keep working until the batteries are almost completely drained, which is great for reducing waste.
What happens if an OTA update fails midway?
If the connection drops during a wireless update, the board will notice the data is incomplete. Because it uses the external Flash memory to store the new code first, it won’t erase the old working code until the new version is fully verified. This “fail-safe” design prevents the board from becoming a useless “brick” if the update fails.
Is the antenna included with the board?
Usually, the board comes with a simple wire antenna that works well for basic projects. If you need more range, you can solder a specialized SMA connector or a U.FL micro-connector to the board. This allows you to attach a larger, more professional antenna to boost your signal strength.
Can I use the I2C bus for multiple sensors?
Absolutely, the I2C bus is designed for sharing. You can connect many different sensors, like a pressure sensor and an OLED screen, to the same two wires. As long as each device has a unique address, the Antennino can talk to them all individually without any extra wiring.
How do I monitor the battery level in my code?
The board has a built-in voltage divider connected to the A0 analog pin. By reading the value on this pin, your code can calculate exactly how many volts are left in the batteries. This is useful for sending a “low battery” notification to your phone before the device goes offline.
What is the maximum current the 3.3V regulator can provide?
The onboard regulator can typically handle up to 125mA. This is plenty for the microcontroller, the radio, and a few sensors. However, if you try to power large motors or very bright LED strips, the regulator might overheat or shut down. For heavy loads, you should use a separate power source.
Can I program Antennino with the Arduino Web Editor?
Yes, as long as you have the Arduino Create Agent installed on your computer, the web editor will recognize the board. Since it uses the same chip as the Arduino Uno, you can select “Arduino Uno” in the board menu and it will work perfectly for uploading sketches.
Why is there an optoisolator on the board?
The optoisolator is a safety feature that allows an external signal to wake up the board. It uses light to pass a signal, which means there is no direct electrical path. This protects the sensitive timer and microcontroller from static electricity or high-voltage spikes coming from external wires.
Can the board measure negative temperatures?
The built-in DS18B20 sensor is very capable and can measure temperatures from -55°C to +125°C. This makes it perfect for outdoor weather stations or monitoring freezers. The sensor is very accurate and does not need any calibration from the user.
How do I reduce the power consumption of the LED?
The notification LED is helpful for debugging, but it wastes energy if it stays on. In your final code, you should make sure the LED only blinks very briefly or stays off entirely. You can also physically remove a jumper or cut a trace if you want to disable it permanently for a “stealth” sensor.
Is Antennino suitable for industrial environments?
While it is great for hobbyists, the board is also built with high-quality components that can handle professional use. The hardware encryption and robust 433MHz signal make it a good candidate for monitoring factories or warehouses where Wi-Fi might be unreliable or crowded.
What is the difference between Antennino and a standard Arduino Pro Mini?
An Arduino Pro Mini is just a basic board with no wireless or power management features. To make it work like an Antennino, you would have to add a radio, a flash chip, an external timer, and a voltage regulator yourself. Antennino puts all of these essential IoT tools onto one single, optimized board.