

When it comes to ensuring your GPU (Graphics Processing Unit) is running at its best, stress testing is an essential part of the process. Whether you’re a gamer, a content creator, or someone working with demanding visual tasks, ensuring that your graphics card performs optimally under heavy loads is crucial. But how do you know if your GPU can handle the intense demands of gaming, video editing, or 3D rendering without running into stability issues, overheating, or graphical glitches?
In this guide, we’ll take you through the 10 best GPU stress-test software tools for Windows that can help you ensure your system is up to the challenge. From benchmarking tools to burn-in testing, we’ve got you covered. By the end of this article, you’ll be equipped with the knowledge to choose the right tool for your needs and stress test your GPU effectively.
What is GPU Stress Testing?
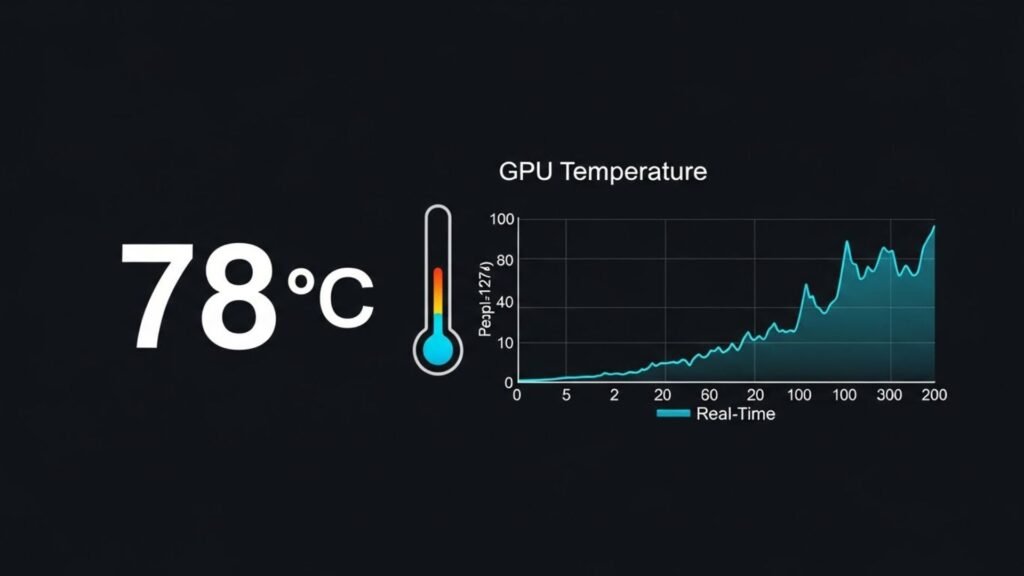
Before diving into the tools, let’s first understand GPU stress testing. Stress testing involves pushing your GPU to its maximum limits to identify any potential weaknesses, such as overheating, instability, or performance issues. This is especially important for gamers looking to get the most out of their graphics card, and for professionals who need reliable hardware for 3D rendering or video editing.
Stress tests can also help identify issues such as thermal throttling, where the GPU automatically reduces its performance to avoid overheating, as well as power supply issues and errors related to overclocking.
Stress testing is not only used to identify flaws but also to ensure GPU longevity, stability, and reliability under intense workloads. It ensures that the GPU performs optimally over time, reducing the chance of unexpected crashes or malfunctions during critical tasks.
Stress testing is particularly beneficial for enthusiasts who like to overclock their GPU or users who need to push their hardware to the limits for rendering, VR (virtual reality) environments, or gaming. But knowing how to stress test properly is essential, as excessive testing can lead to overheating and possible hardware damage if cooling systems are not sufficient.
Why Should You Stress Test Your GPU?
Stress testing your GPU can uncover critical issues that may not show up during regular use. Here are some of the reasons why stress testing is vital:
- Performance Monitoring: Test the GPU performance under maximum load, helping to identify any instability or performance issues that could affect gaming or professional work.
- Overclocking Safety: Overclocking can cause instability and overheating. Stress testing ensures that your overclock settings are safe and won’t damage your hardware.
- Cooling Efficiency: By stressing your GPU to its limits, you can evaluate how well your cooling system handles the load. An inadequate cooling solution can cause your GPU to throttle performance, reducing efficiency.
- Benchmarking: Stress testing provides detailed benchmarking data that allows you to compare GPU performance before and after overclocking or upgrading components.
- Heat Management: A well-managed thermal profile is crucial to maintaining GPU performance. Stress testing helps to ensure your graphics card does not overheat during sustained heavy workloads.
- Error Detection: Stress tests help detect errors in VRAM usage, graphical glitches, or other hardware faults that may not be visible during light use.
The 10 Best GPU Stress-Test Software for Windows
Now, let’s dive into the 10 best GPU stress-test software tools available for Windows. We’ll provide an overview of each tool, what makes it stand out, and the kind of pain points it addresses.
1. FurMark: The GPU Burner
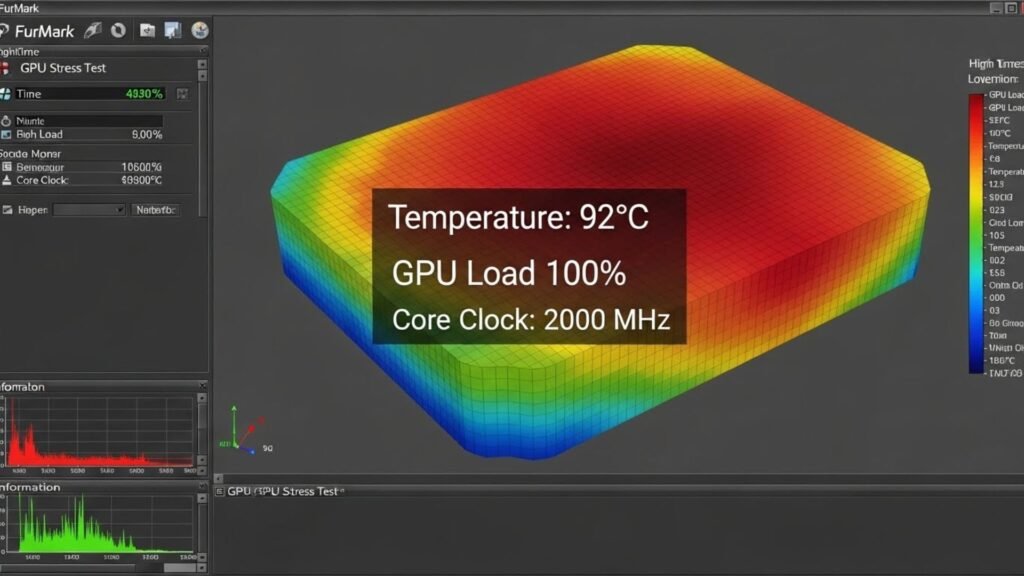
FurMark is one of the most popular GPU stress-test software tools available. Known for its intense stress-testing capabilities, it’s often referred to as a GPU burner due to the extreme load it puts on your graphics card. This tool is ideal for pushing the GPU to its thermal limits and is great for thermal performance testing.
Pros:
- Intense stress on GPU. FurMark is particularly useful for testing the thermal limits of your GPU, forcing it to reach higher temperatures than most gaming or rendering applications would.
- Real-time monitoring of temperature, fan speed, and core clock frequencies.
- Great for overclocking stability tests. If you have overclocked your GPU, FurMark can help you determine whether it’s stable under load.
Cons:
- Can be too intense for older GPUs, potentially causing overheating if cooling isn’t sufficient. FurMark pushes your GPU harder than most applications, which might be unsafe for cards that don’t have proper cooling solutions.
- It is not always representative of real-world scenarios. Since FurMark creates synthetic load, it may not simulate everyday performance as accurately as other tools like 3DMark or Unigine Heaven.
Best For: Users needing a high-performance GPU stress test or those overclocking their system to test stability under extreme conditions.
2. 3DMark: For Gaming and Benchmarking
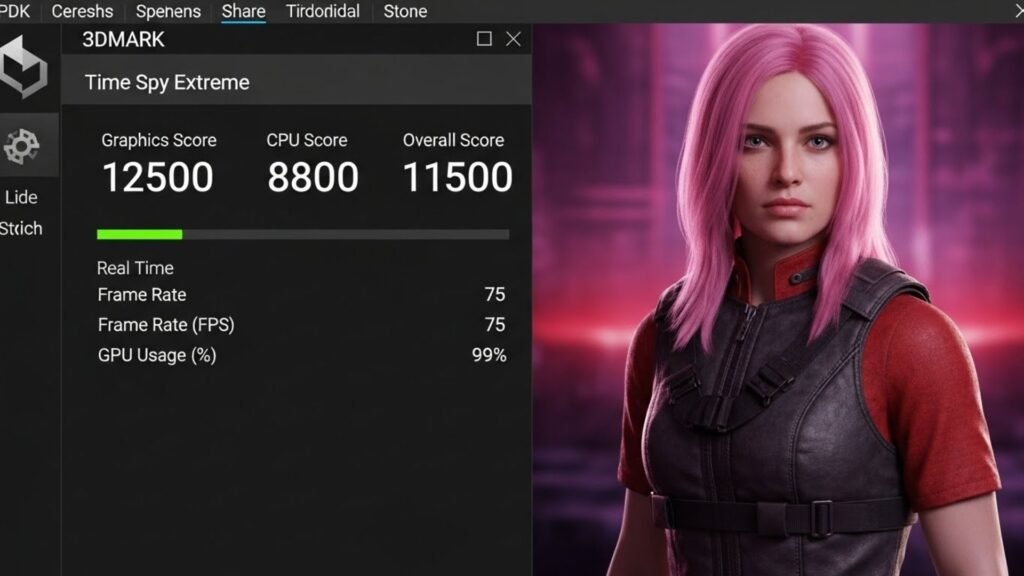
If you’re looking for a more balanced stress test that simulates real-world gaming and 3D rendering scenarios, 3DMark is the go-to tool. With benchmarks like Time Spy and Port Royal, it’s a great way to test GPU performance under the strain of DirectX 12, ray tracing, and other advanced graphics APIs.
Pros:
- Realistic stress test simulating gaming performance. 3DMark uses stress tests that mimic the heavy graphical load of modern video games.
- DirectX 12 and ray tracing support, offering a closer look at the performance of modern GPUs under advanced graphical loads.
- Provides detailed performance scores for comparisons. After running the test, you’ll receive detailed insights into how your GPU stacks up against others.
Cons:
- Paid features, especially for advanced tests like Fire Strike or Port Royal.
- While it’s a fantastic benchmarking tool, 3DMark can be less useful for testing certain specific thermal limits or issues related to GPU cooling under high temperatures.
Best For: Gamers and content creators who want to simulate actual gaming loads and measure GPU performance.
3. Heaven UNIGINE: For Extreme Load Testing
Heaven UNIGINE is another widely used GPU stress test tool designed to push your GPU to its limits with an immersive 3D environment. It’s an excellent tool for both stress testing and performance benchmarking, with a particular focus on real-time graphics rendering.
Pros:
- Beautiful 3D environments with OpenGL and DirectX support. Heaven UNIGINE includes an expansive 3D world with intense lighting, particle effects, and tessellation.
- Excellent for long stress tests. This tool allows users to stress test their GPU over extended periods, which is ideal for testing thermal stability.
- Temperature monitoring during the stress test. Heaven UNIGINE provides real-time monitoring of your GPU’s performance, which is especially helpful in identifying thermal throttling issues.
Cons:
- May not push the GPU as hard as FurMark, so it’s more suitable for medium-level stress tests.
- Some users may find the test too focused on graphics rendering and not as comprehensive for overall hardware stress.
Best For: Users who want to combine stress testing with a realistic 3D rendering environment.
4. MSI Kombustor: Comprehensive Stress and Monitoring
Developed by MSI, Kombustor is a powerful tool designed to stress your GPU while also allowing you to monitor real-time sensor tracking. It’s an excellent option for testing multi-GPU setups and checking for thermal throttling under load.
Pros:
- Includes artifact scanner to detect graphical glitches. If your GPU fails during a stress test, Kombustor can detect graphical artifacts like screen tearing or color shifts.
- Provides real-time monitoring and sensor tracking for all critical GPU parameters, including clock speeds, temperatures, and fan speeds.
- Supports multi-GPU setups. For users with complex setups involving multiple GPUs, Kombustor is a perfect tool for stress testing the entire system under load.
Cons:
- May not be as intense as FurMark for extreme stress tests, but it’s still a robust tool for everyday users and professionals.
- As with most stress-testing software, Kombustor can cause overheating if your cooling system isn’t properly maintained.
Best For: MSI hardware users and anyone needing detailed GPU diagnostics alongside stress testing.
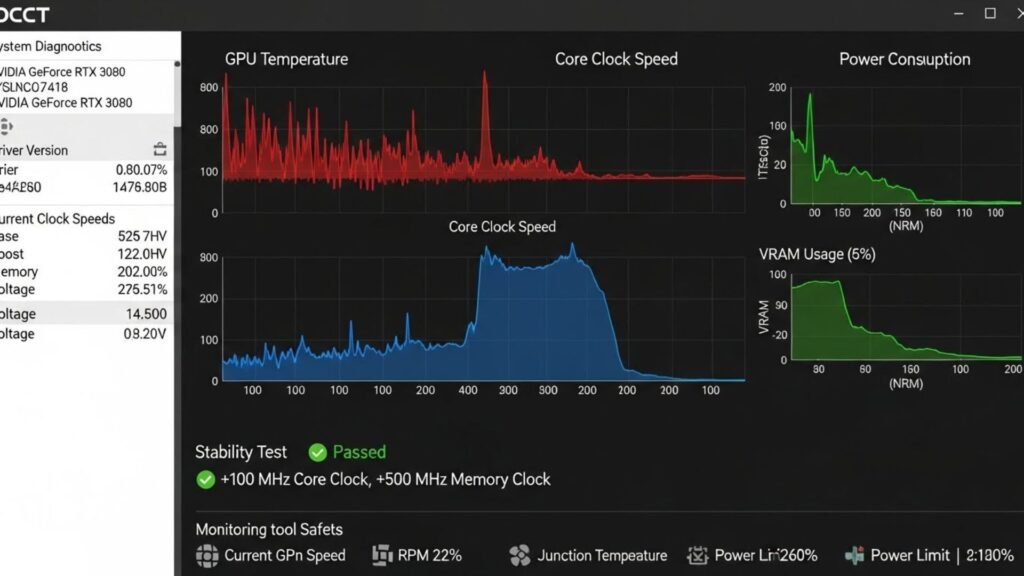
5. OCCT: The Overclockers’ Tool
OCCT (OverClock Checking Tool) is a versatile tool for both stress testing and system diagnostics. It is widely used for overclocking validation and can detect power and thermal issues across GPU, CPU, RAM, and more.
Pros:
- Great for overclocking stability and system diagnostics. If you’ve overclocked your GPU, OCCT can help you test whether your system remains stable at higher clock speeds and voltages.
- Can test GPU, CPU, and RAM all in one tool, providing a complete overview of system health.
- Provides automated alerts if system parameters exceed safe limits, helping you identify potential issues before they cause permanent damage.
Cons:
- Requires a little more technical knowledge to interpret the results, especially for users unfamiliar with system diagnostics.
- While it’s comprehensive, OCCT can be overwhelming for beginners who just need to stress test the GPU.
Best For: Overclockers and anyone wanting a multi-functional stress test tool for the entire system.
6. PassMark PerformanceTest: System Overview
PassMark PerformanceTest provides a complete system benchmark, including GPU performance tests. This tool offers an excellent overview of how well your GPU is performing in relation to other systems on the market.
Pros:
- Provides detailed performance comparison against other systems.
- Includes GPU, CPU, RAM, and disk testing, providing a full view of how your system performs under load.
- User-friendly interface for beginners who need a quick and easy way to check system performance.
Cons:
- More of a benchmark tool than a stress test tool.
- Stress testing is somewhat limited compared to other specialized tools like FurMark or 3DMark.
Best For: Users looking to compare their GPU performance against a broad database of systems.
7. AIDA64 Extreme: The Enterprise Tool
AIDA64 Extreme is primarily used for hardware diagnostics and is commonly used in enterprise settings. It offers stress testing capabilities for the GPU, as well as temperature monitoring, VRAM usage, and system stability tests.
Pros:
- Comprehensive diagnostics for all system components. AIDA64 Extreme provides detailed diagnostic information about GPU, CPU, RAM, and other hardware.
- Works well for enterprise and professional use, offering advanced features for power users and IT professionals.
- Supports OpenGL and other GPU stress tests, making it versatile for different use cases.
Cons:
- It’s a paid tool with a higher price tag, which might not be suitable for casual users or hobbyists.
- Can be complex for beginners who are not familiar with system diagnostics.
Best For: Professional users who need in-depth diagnostics and stress testing for their GPU.
8. GPU-Z: The Monitoring Tool
While GPU-Z is not a stress test tool in itself, it is an excellent companion for GPU stress testing. It provides detailed information about your GPU’s performance, clock speeds, temperature, and more during a stress test.
Pros:
- Excellent real-time monitoring of GPU stats, including clock speeds, temperature, fan speed, and VRAM usage.
- Free tool with no extra features or paid version required.
- Ideal for monitoring your GPU during a stress test from other tools like FurMark or 3DMark.
Cons:
- Doesn’t provide stress testing — just monitoring.
Best For: Anyone who needs to monitor GPU parameters while using other stress testing tools.
9. Novabench: For Quick Stress Testing
Novabench is a quick and easy benchmarking tool that can also perform a basic GPU stress test. It’s ideal for users who need a simple, fast comparison without going into too much detail.
Pros:
- Fast and lightweight.
- Offers GPU and system performance benchmarking, giving you a basic idea of how well your GPU performs under load.
Cons:
- Not as thorough as other tools for intense stress testing.
- Lacks detailed insights into thermal throttling or VRAM issues.
Best For: Casual users who need a quick overview of their GPU’s health.
10. UserBenchmark: A Quick Comparison Tool
UserBenchmark is a popular tool that allows users to compare their GPU performance against other user-submitted benchmarks. It’s a fast tool for comparing GPU performance in real-world scenarios.
Pros:
- User-submitted benchmarks for comparison, giving you insight into how your GPU stacks up against others.
- Offers a quick snapshot of GPU performance, allowing users to gauge whether their GPU is performing as expected.
Cons:
- Not a stress test in the traditional sense — it’s more about system comparison.
- Lacks the depth of stress testing tools that evaluate long-term stability.
Best For: Beginner users who want to quickly compare their GPU against other systems online.
How to Stress Test Your GPU: Best Practices
Before you jump into the testing process, here are some best practices to follow:
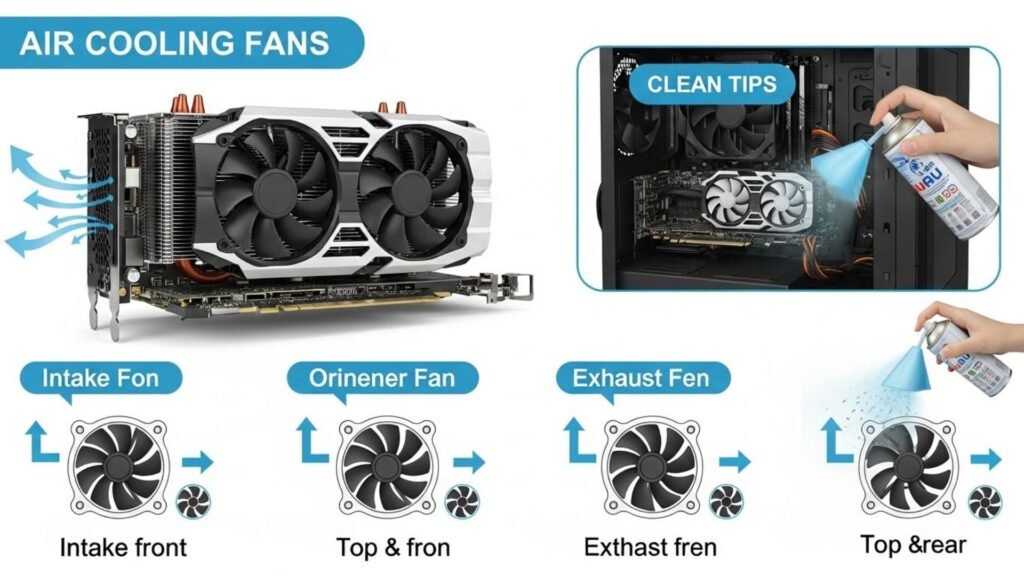
- Preparation: Ensure that your GPU cooling system is functioning properly. Clean out any dust and ensure airflow is optimal. Make sure the GPU fans are working efficiently.
- Monitor in Real-Time: Use GPU-Z or similar tools to monitor temperature, clock speeds, and fan speeds during the stress test. This allows you to track performance in real time and catch any potential issues.
- Safety: Avoid running stress tests without proper cooling; overheating can damage your GPU permanently.
- Test Duration: Depending on the test (and your GPU), running the test for 30–60 minutes is generally recommended. However, more intense tests may require a longer period.
- Stop the Test if Necessary: If your GPU temperatures rise to unsafe levels, stop the test immediately. Always ensure your cooling system is up to the task before running high-stress tests.
Conclusion
Stress testing your GPU is an essential step in ensuring your hardware is up to the task, whether for gaming, content creation, or professional use. By using the best GPU stress-test software listed here, you can identify potential hardware issues, monitor cooling efficiency, and ensure optimal performance.
Choose the tool that best fits your needs, and remember to always monitor temperature and performance during stress tests to avoid damage. Happy stress testing!
FAQs
How long should I stress test a GPU?
Stress tests should generally last between 30 minutes to 2 hours depending on the intensity of the test. Longer tests are often used to verify long-term stability and to check for thermal throttling.
Can stress testing a GPU damage it?
If done incorrectly, stress testing can overheat a GPU, especially if it’s not properly cooled. Always ensure your system has adequate cooling before starting the test.
What happens if my GPU fails a stress test?
If your GPU fails a stress test, it indicates potential stability issues, such as overheating or VRAM faults. You might need to improve your cooling system, or in some cases, consider a replacement if the hardware is defective.
Is FurMark the best GPU stress test tool?
FurMark is an excellent tool for pushing your GPU to its thermal limits, but it can be overly harsh for older GPUs. It’s best used with caution and proper cooling.